Gastrobabble

A quest for gastro-liberation, an excuse to buy more cookbooks…


Leave a comment >

20121212-154404.jpg

I used to be a Christmas cake hater. All that boozy fruit and tooth-achingly sweet fondant icing. But I’d never had homemade Christmas cake until last year.

My then-flatmate brought some of her mum’s homemade cake home and instructed me to eat it with a crisp tart green apple and the mild, salty rubble of some Wensleydale. It turned me around gentle readers, it really did. The fruity richness of the cake was perfectly offset by it’s equally rambunctious playmates of cheese and apple. So, I’ll never eat Christmas cake in any other way now.

And when I decided to make my own this year, I thought that Dan Lepard’s recipe for a caramel Christmas cake would sidestep the throat-sticking booziness of a traditional Christmas cake but replace it with the smokiness of caramel. It turned out to be a very prudent choice indeed. So, now I’ll never eat Christmas cake any other way and I’ll never make any other Christmas cake.

20121212-155327.jpg


Leave a comment >

20121210-214336.jpg

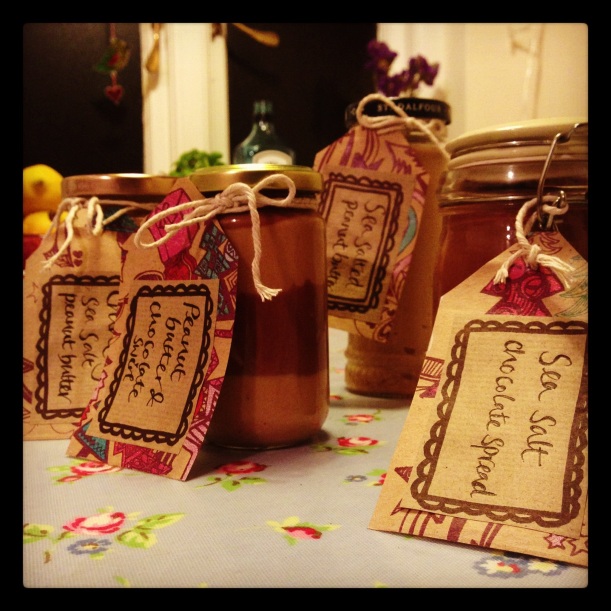
It isn’t hyperbole when I profess my love for peanut butter. Were gluttony and decorum no consideration, I would probably work peanut butter into every meal humanely possible. I’ve been known to put it into stir fries; dip chocolate or celery sticks into it; or just idly eat it from the jar whilst I’m waiting for the kettle to boil.

I adore the salty/sweet play of flavours with English peanut butter (let’s not talk about the American oversweetened stuff). It’s the combination which I love in other things: salted caramel; chocolate covered pretzels; compost cookies. And now that I’ve made my own peanut butter, I love how cheap and easy it is to make.

All you need is a food processor. Seriously. And not even a worktop food processor. (I am not fortunate enough to own one nor have the space for one.) I used the mini food processor attachment on my hand blender which handily makes just enough for one jar. Oh and on a jar note: I’m a crazy jar hoarder. I collect, clean, sterilise and scrape labels off year round. It’s worth it once you get to Christmas. If you’re not as nuts as me, TK Maxx and DotComGiftShop sell cheap jars of all sizes.

It’s an ideal thing to make for Christmas gifts because it’s stupidly simple to make; incredibly cheap; and unlike chutney or jam, it is something that on the whole, most people love (though perhaps, not as obsessively as me…)

Homemade peanut butter
The recipe given is the basic template for peanut butter. Well I say “recipe”. That’s too fancy a word for what it really is. Anyway, add what you like to it! For chocolate spread, add melted chocolate. You could also make a boozy version using Frangelico, coffee liquier or Bailey’s. You could go festive with apple purée and cinnamon. Or use honey roast peanuts. Or even different nuts all together, cashew makes a particularly lovely buttery, um, nut butter.

20121210-210033.jpg

Ingredients
Salted peanuts
Golden syrup
Sea salt flakes

Throw all your peanuts into a food processor. I am not fortunate enough to be equipped with a food mixer stand, nor the space for one so I used the mini food processor with my hand blender (it’s the one you can use to finely chop herbs and onions. Or in my case make breadcrumbs. Lazy, I know.) Basically all you need to do is blitz until it turns into a smooth, creamy peanut butter. It will go from chopped nuts; to a doughy ball; to a grainy paste; and then miraculously, a smooth, runny peanut butter. Add in a touch of golden syrup to balance out the flavour and then a generous sprinkle of sea salt flakes to add a bit of textural crunch. Transfer to sterilised jars whilst still warm and runny.

Notes on variations
Adding in any flavourings like alcohol will cause the butter to seize up but do not fear. The runny smooth consistency is mainly due to the heat from the food processor. So add in your flavourings and then blitz for a few more minutes to warm it up and fully combine.

To make chocolate spread, simply stir in melted chocolate. I went for milk chocolate but I suspect dark would work well too. If you want to make a true Nutella substitute, then use skinless hazelnuts in place of the peanuts.

Finally, for crunchy peanut butter, stir through a handful of whole peanuts once processed.


Leave a comment

Crunchie nuggets

20121202-231045.jpg

So I know that every bloody food blog going runs a twee make you own edible Christmas gifts! style feature at this time of year. Whilst in principle I like the idea, between all the Christmas parties/quaffing of mulled things/mandatory viewing of Christmas films, who has time to churn out lovely thoughtful and artisanal looking hunks of chocolate bark for everyone? I did it last year and was up until 1am getting increasingly fretful about the way that crushed candy canes are a pisser to deal with (far too sticky).

Things like chutney and mincemeat are great because they’re easy to churn out in batches and dole out to people. But in my experience, chutney isn’t a universally loved thing and mincemeat is only a good gift for other baking nerds. Sweeties however, are pretty safe territory.

Cinder toffee. Honeycomb. Hokey pokey. Many names for what is basically sugar and golden syrup bubbled up into honeycomb with the aid of some bicarbonate of soda. Dip it in chocolate and you get what is essentially a homemade Crunchie. Apparently it is unacceptable to gift mass manufactured cheap confectionary for Christmas but make your own and most people will consider you a Wonka-like figure.

Crunchie nuggets
20121208-074639.jpg
I made this in one large silicone cake mould but small silicone cupcake cases or mini loaf moulds would work well too. In any case, use silicone where possible as it makes life (i.e. the washing up situation) far far easier. (Pro tip: before washing up things that have contain hot syrup, let it soak in very hot water first. This will dissolve all the sugar and prevent any tantrums.)

Ingredients
200g sugar (caster or granulated)
4 tablespoons golden syrup
1 teaspoon bicarbonate of soda
400g dark chocolate

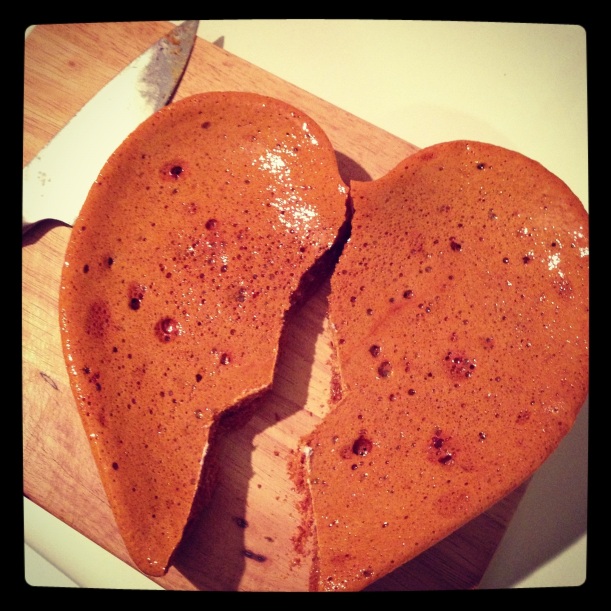
In a heavy bottomed pan, combine the sugar and golden syrup. Heat and stir until the mixture caramelises to a gingery colour (think Irn-Bru). Take off the heat as soon as it reaches this point and whisk in the bicarbonate of soda, at which point it should froth up like some sort of amateur Wiccan cauldron. Pour into your mould and leave to set for a few hours until firm.

Once it is set, cut up the honeycomb as best as you can (don’t try to go for uniformity, it is nigh on impossible). Melt the chocolate in a heatproof bowl set over simmering water and keep on a low heat whilst you dip and coat the nuggets in, leaving them to cool on a sheet of greaseproof paper. I used crumbs of honeycomb to decorate but sea salt flakes or gold leaf would be suitably in vogue as well.


2 Comments

Merry kitschmas

I’m pretty sure that St Nigella herself would wholeheartedly agree with me that if you can’t unleash the kitsch at festive occasions, when can you? And whilst I’m in agreement with Giles Coren’s comments on why Christmas dinners should stay trad, I also think there is room in your Christmas for a little off-piste baking.

Christmas battenburg

Think about it. Battenburg – name of German extraction (home of many a Christmas tradition); dates from the Victorian era (age of many a Christmas tradition); and is covered in marzipan (festive as fuck). Not only is this ripe for a Christmas adaptation but it is also an impressive-looking addition to your Christmas junk intake which is surprisingly low-effort.

Also, do you really need another recipe for mince pies?

Merry Christmas gentle readers, go forth and overeat.

Mince pie Christmas tree

Kitschmas Battenburg

A note on marzipan: I have made this with shop-bought marzipan and also home-made marzipan. Whilst shop-bought marzipan is easier to handle and ideal for covering cakes, home-made marzipan cannot be rivalled in flavour. Any cracks that appear are just going to be dusted over with a snowy drift of icing sugar, so worry not. I was lucky enough to inherit some home-made marzipan (middle-class much?) so it is easy for me to advocate the home-made version.

Ingredients

350g marzipan

225g softened butter

225g caster sugar

225g self-raising flour

3 large eggs

1 teaspoon vanilla extract

Pinch of salt (omit, if like me you use salted butter)

red and green food colouring

2 heaped tablespoons apricot jam

icing sugar, to decorate

Preheat your oven to 180c/350f/gas mark 4 and prepare your tin. (This is the trickiest part of battenburg making, so once you get this out of the way you can breathe easy.) Using either a square or rectangular brownie tin, line using greaseproof paper and foil. What you want to achieve is a sheet of greaseproof paper which has a divider for the two coloured batters in the middle which is stabilised by some foil.

Battenburg

Trust me, this works. The sponge is a standard sponge, as used for a Victoria Sponge, which if you’ve ever made one, you will know that it is a not particularly loose or runny mixture. The foil stabiliser should be placed underneath the greaseproof paper (something which only occurs to me after making two battenburgs. They haven’t suffered for my foolish belated realisation, so rest easy, nothing is a baking disaster. Apart from overdoing it with the bicarbonate of soda.)

In a large mixing bowl, cream together the butter and sugar until light and fluffy. Beat in the eggs and vanilla extract until smooth and fully combined, then mix in the flour and salt. Don’t be tempted to add milk to loosen the mixture – the food colouring will aid with this. Scoop out half of the batter into another bowl and add your red and green food colouring to each half. Be generous – you want the colours to be quite vibrant! Be warned, you will need to add substantially more green food colouring than you will red. An eye-watering amount in fact. Ignore your e-number fears and soldier on valiantly. It is Christmas after all.

Pour your prepared and festively coloured batters into your now-beautifully prepared tin. Bake for 20-25 minutes, until an inserted skewer comes out cleanly and it is firm to the touch. Leave to cool completely in the tin before removing.

Whilst you are waiting for your sponges to cool, roll out the marzipan to your desired thickness. I find that rolling it out on a sheet of greaseproof paper and dusted with either cornflour or icing sugar helps to defy any stickiness.

Heat up the apricot jam with a little water, either in a pan on gently in the microwave. If you can be bothered to sieve out the lumps, please do so but I have gone without this step and have not endured any sleepless nights or baking-related shame.

Now, to the construction. Using a large bread knife (or any knife with a serrated edge), finely trim off all the edges of the sponges, barring the bottom. Cut each sponge in half lengthwise and you now have your four battenburg squares, ready to be put together. Using a pastry brush and the apricot jam, glue the sponges together and to the marzipan. Add a dab of apricot jam to the joining seam of marzipan – this is the bottom of the battenburg. Using the bread knife, trim off the ends of the battenburg to neaten up.

Plate up, dust liberally with icing sugar and decorate with any garish Christmas decorations you can lay your hands on. I found some edible snowmen in a Christmas sprinkles pack and pushed two of them into the top of my winter wonderland battenburg. Serve whilst wearing novelty reindeer antlers and with mulled wine in teacups.